
Cleaning lint from your hairbrush isn’t going to be the most exciting task you complete today but it can be fun…. Yes fun…. Really! Most hairbrush cleaning advice is boring so here are some simple fun tips about how to clean a hairbrush lint that you might even enjoy reading.
Later we find out what Lint is, how to clean a hairbrush mindfully, why a clean hairbrush is important and see some useful lint removal tools. We know hair care is just as important as hair brush care so check out my favourite Japanese hair care products too. Tools aren’t always necessary but they can make your life easier. Before I show you exactly how to clean hairbrush lint, here are 2 tools that are perfect for helping you clean your hairbrush.

Contents
5 Steps to clean lint from your hairbrush!
Welcome to the magical fantasy world of the SeekPretty fashion and beauty blog where I’m going to need your help on a quest to quickly rid all hairbrushes of that yucky evil lint.
Hairbrush Lint cleaning Step 1 – Battle with the tangled hairs
Prepare yourself, helmet fastened, gloves on, scissors in hand and sink clean and ready for action. This is the point where there is no turning back, you need to focus at the task in hand and be mentally ready for action!. The survival of all hairbrushes is in your hands.
- Use your hands to pull out those long strands of hair that weave and attach themselves to the bristles of your brush. If we are going to get to the lint that’s hiding beneath them we need to remove these first so we can see what we are dealing with.
- If the hairs are fighting back and won’t untangle as easily as you would like, use some scissors, place them between the bristles ( warn the bristles first that they should keep out of the way and be sure not to harm them ) and cut out big strands of hair to remove as much as possible.
Step 2 – Softening lint in sink
If you’ve made it this far, well done. We have left many behind who became so tangled in hair tightly wrapped up to the bristles that they gave in to the lint monsters and surrendered. You are tougher than that, so you deserve to have a couple of seconds rest now. Don’t lose focus though, the longer you wait the more time the lint has to hide away.
- Put a plug in your sink and turn on your tap so that warm water is coming out.
- While the water is rising in your sink, hold your hairbrush under the water and use your fingers to remove any hairs that come loose.
Step 3 – Comb between bristles
Now, if everything has gone to plan so far you should have 1/4 or 1/2 sink of warm water. I’m afraid we lost a few fellow beauty lovers along the way. Some were failed by a loose plug and others forgot to put the plug in.
- Add some gentle soap, shampoo or cleanser on your hairbrush and massage it onto and between the bristles and across the head of your brush.
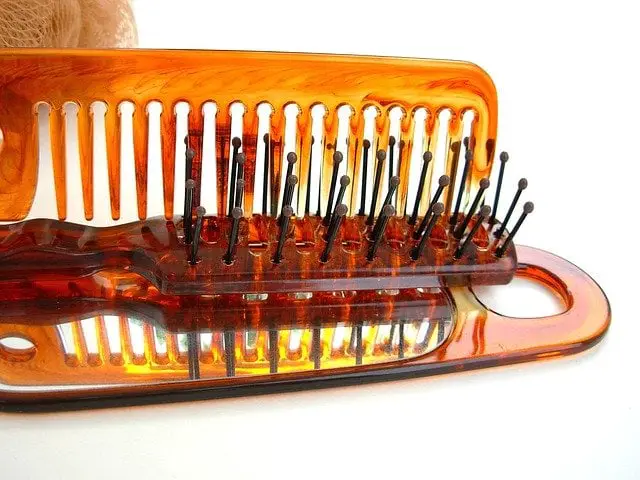
- Use a wide-tooth comb, ideally one that isn’t too bendy. A strong comb that is metal will work best here. Hold the comb and slide it between your hairbrush bristles and try to work out any loose hairs with a slide to side motion.
This Desert breeze comb and hairbrush cleaner is the perfect cheap tool for helping you at this stage of your hairbrush cleaning routine:
Click the image above to view the product and price on Amazon
Step 4- Cleaning lint from the bristles
If you’ve made it this far, congratulations, we are so close to completing this beautiful mission and getting rid of all those unwanted hairs and lint from our beautiful brushes. The last few segments of lint are standing and ready to be cleansed away to a place where they can do no more harm to your hair or scalp.
- Once you’ve removed lots of grime, dirt and hairs with your comb we need to wash away the lint and other unwanted bits stuck on the base of your hairbrush bristles.
- Get hold of your final weapon against lint, an old toothbrush, scouring pad or cloth.
- Using your tool of choice you need to work the fabric along your brush, holding and rising up along each set of bristles and between them making sure you remove every bit of lint that you can see. This is your last chance for completely removing unwanted sediments so scrub hard and cover all areas of the brush head to make sure it’s sparkly clean.
- Unplug your sink and watch in awe as the black and colourful lint are washed down into the plug hole for the last time.
Step 5 – Final step – Hair brush protection
I’m lost for words and starting to tear up. It’s been great having you join me on this journey and finally we have cleared out all the dirt and lint from are lovely brushes that keep our hair looking fab.
- Find a small dry towel and place it somewhere you can leave it for several hours.
- Place your hairbrush onto the towel with the bristles pointing down towards the towels surface. This will help any moisture drip down and onto the towel rather than back onto the handle and brush head.
- Leave you brush overnight or for several hours and when you are happy that it is dry you are good to go brushing your hair with a lovely clean hairbrush.
Why it is important to clean Lint from your hairbrush regularly ( don’t be lazy, it’s fun! )
I think you all enjoyed working through my simple 5 steps for clearing out all the lint from your hairbrush but to save yourself the difficulty of trying to unwind all your hairs and cleaning yucky lint from the bristles, a littler regular maintenance will save you all this time and effort.
Saving time isn’t the most important reason for clearing out lint and cleaning your hairbrush. The most important reason is to prevent a build up of the dirty skin flakes, old used products, hairs and oils from helping bacteria to grow.
This build up of hair and lints on your brush also makes brushing your hair more difficult, the bristles can’t work smoothly through your hair and more easily become tangled.
What is hairbrush lint ( It’s not as tasty as you might think!)
OK, I hope you are ready… brace yourself. I’m going to write a list of the lovely ingredients you often find on a dirty hairbrush.
- Skin cells. Usually these are tiny flakes that bind together on the bristles of your brush or they get caught in your hair.
- Dust, pet hairs and other dirt that you quickly find building up around your home.
- Sebum.
- Broken strands of hair that fall out during brushing and end up snaking their way into a new home on your brush.
- Food, cream, hairspray and all the other strange things you come in contact with in your daily life. It’s strange to imagine what gets stuck in your hair and then this also ends up on your brush.
How to make hairbrush cleaning a mindful learning experience
Well, I never though I’d be writing about how cleaning your hairbrushes can be a mindful experience. In fact, I wish I didn’t have to clean hairbrushes at all, but now I know what’s hanging around on them and what lint is, I’m really glad I put in the extra effort to clean every couple of days.
Most of your beauty routine can be a mindful experience if you focus on what you are doing. I used to blast out music or let my thoughts run wild, but now I pay much more attention to the sensations I experience during my makeup routine and really pay attention to my skin and how it feels.
While cleaning your brush, enjoy the warmth of the water and focus your attention on what you are touching and look at what you are doing in a relaxed way.
Make your brush cleaning routine a time to rest your mind a little and relax. When you aren’t distracted with a million other ideas and things you’ll clean your brush much better.
Best tools for cleaning Lint from a hairbrush
Maybe you lost the battle above and you decided you need some more help cleaning your hairbrush, or perhaps you decided to jump straight for the easy option. I won’t hold either against you, lets jump straight in and take a quick look at some tools that can help you remove lint and clean your hairbrush.
Olive Garden Brush Cleaner

Click the image to view the Olive Garden brush cleaner on Amazon
This clever hairbrush cleaning tool works great with all different sizes, shapes and styles of brush. Whether your brush is made of nylon, boar bristle, horse hairs or something else, this device will clear up every stray hair and blob of lint without any wasted time. Save yourself a lot of time and use this device to quickly clean up all the lint and gunk from your brush head and easily work out the dirt from individual bristles.
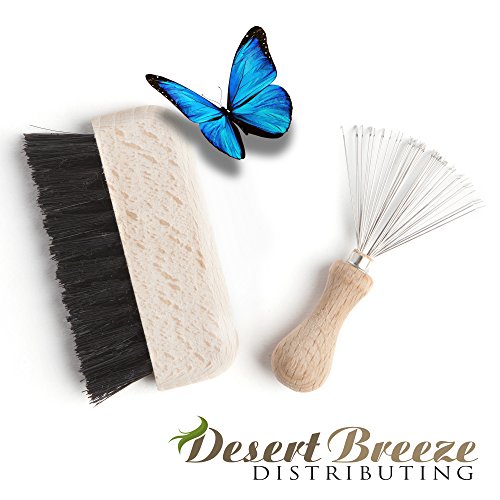
Desert Breeze Hair Brush & Comb Cleaner
Click image to view the Desert Breeze Cleaner on Amazon
This beautifully crafted wooden tool comes with both a rake and brush. The rake is made of metal and the brush has nylon bristles. Amazingly this tool was crafted in the black forest in Germany, at a small family business. Swipe the rake through your bristles a few times and watch how the hair is removed quicker than you can imagine. These tools are small but that’s what’s needed to really clean lint from the hard to reach areas.
Conclusion – Final thoughts about Hairbrush cleaning & Hairbrush lint removal
I hope you’ve had a lot of fun learning about cleaning lint from your hairbrush. We have been on an exciting journey together and I hope you’ll stick around to leave a quick comment or check out some of my other beauty articles. Hopefully you now find cleaning lint from your hairbrush just that little bit more exciting. If you don’t yet enjoy it, perhaps you’ve learnt how to relax and be a little more mindful while cleaning.
If not, at least you know which tools will do the job quickly for you so you can get on with brushing your hair and enjoying your makeup routine and enjoying the activities you love to spend your time doing. Now your hairbrush is clean why not follow our guide and clean your eyeshadow brush.