
Valentine photos can be genuinely cute without tipping into “party aisle at the grocery store” energy. The trick is treating your setup like a tiny corner of styled decor: one strong backdrop idea, a tight color palette, a few intentional props, and lighting that flatters real people in real homes.
This guide is for anyone who wants a Photo Booth for valentines day that feels modern and Pinterest-worthy—something you can set up in a rental living room, a small dining nook, or an empty bedroom wall without drilling holes or buying a bunch of stuff you’ll never use again. Whether you’re doing a Galentine’s night, a cozy date night at home, or family photos with kids and pets, these ideas are meant to look aesthetic up close and in photos.
Board vibe: 10+ Valentine’s Day Aesthetic Ideas
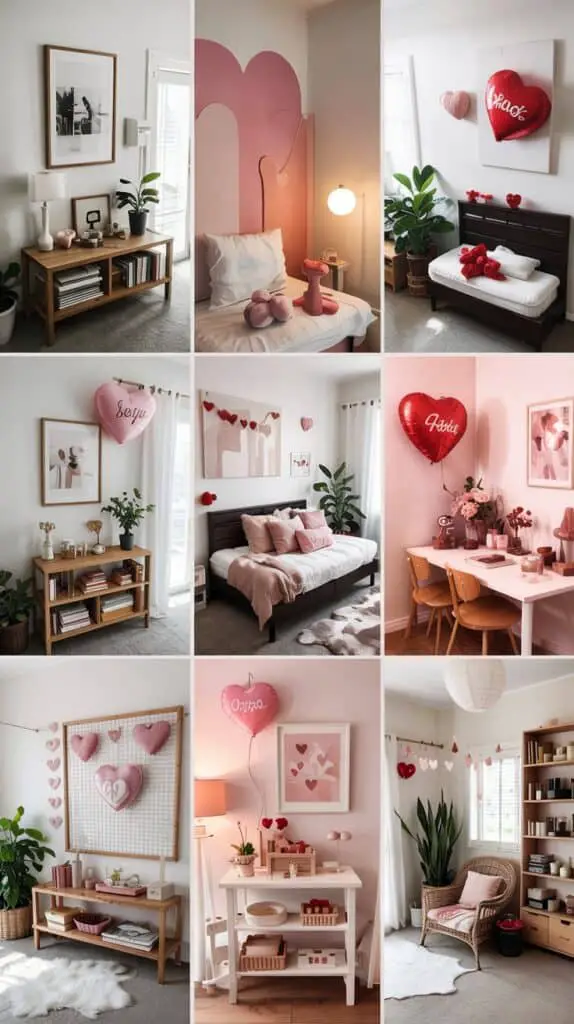
This board is all about soft, pretty Valentine styling that looks like home—warm lighting, calm colors, and small, repeatable “formulas” you can recreate with what you already own. Think pinks and reds that feel grown-up, simple hearts (not cartoon), and setups that work for parties, content photos, and sweet at-home traditions without cluttering your space.
The ribbon wall that reads romantic, not craft fair
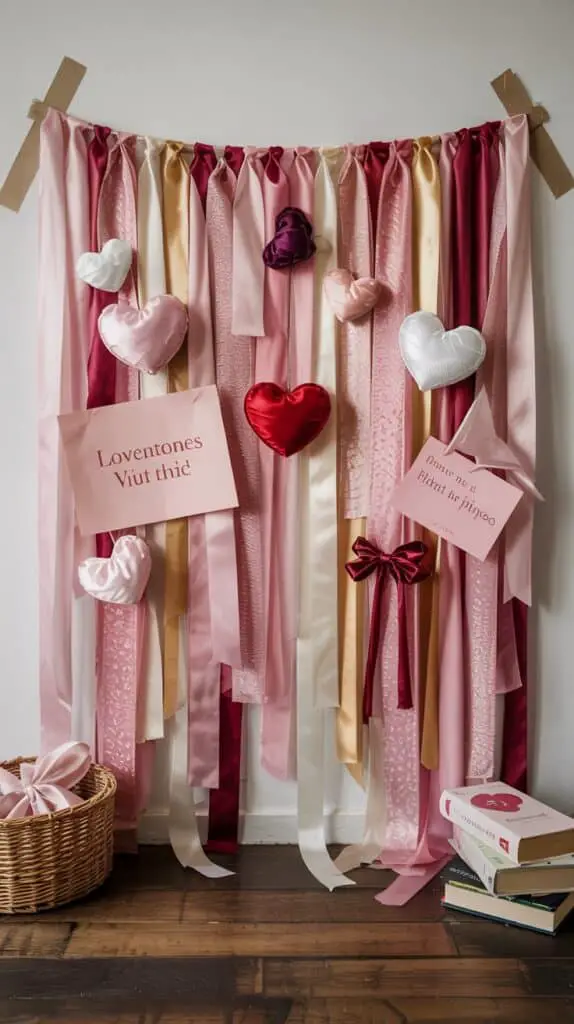
A ribbon wall is one of the easiest Valentine’s Photobooth Backdrop options because it photographs with movement and dimension, but you can keep it sleek if you stick to a limited palette and good spacing.
Use two to three ribbon types max: satin (shine), grosgrain (matte texture), and velvet (soft depth). Choose a palette like blush + cherry + ivory, or rose + burgundy + warm white. Cut ribbons long enough to graze the floor, then tape them to a straight line of painter’s tape at the top (the painter’s tape protects your wall). For a cleaner look, space them slightly apart instead of layering them densely.
Add a simple floor anchor so the ribbons don’t fly around: a low basket or two small book stacks at the bottom corners works. For props, skip novelty and go for a few romantic shapes: a single heart wand, a ribbon bow, and one small sign if you really want it. This is a great setup for renters because everything can come down without damage.
Lighting: put a floor lamp slightly to the side, not directly behind the camera. If you have a warm bulb, use it. A ring light can work too—just diffuse it with a thin white tee clipped over part of it so faces don’t look harsh.
The pink paper roll corner for a clean Valentines Day photoshoot pink backdrop
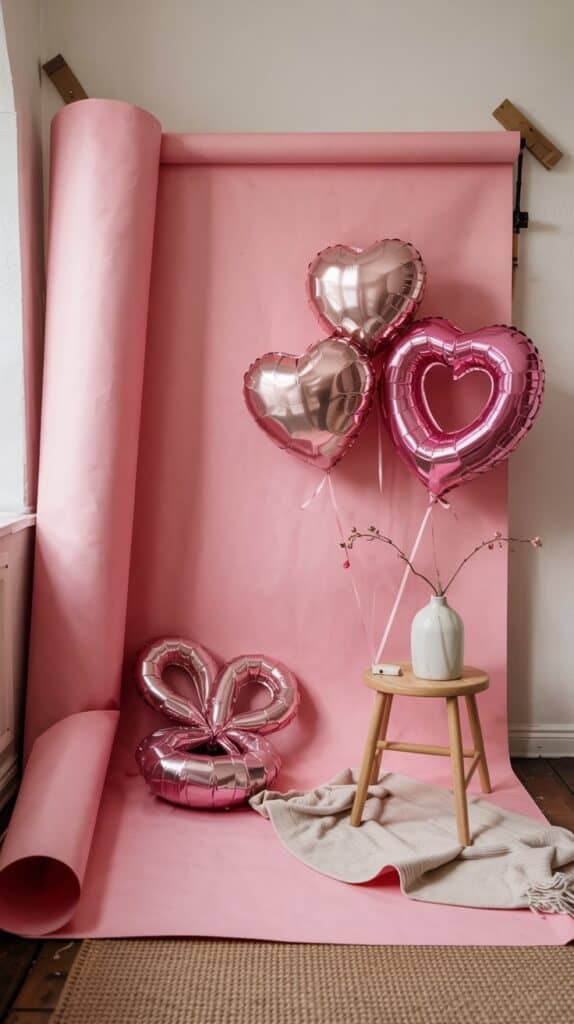
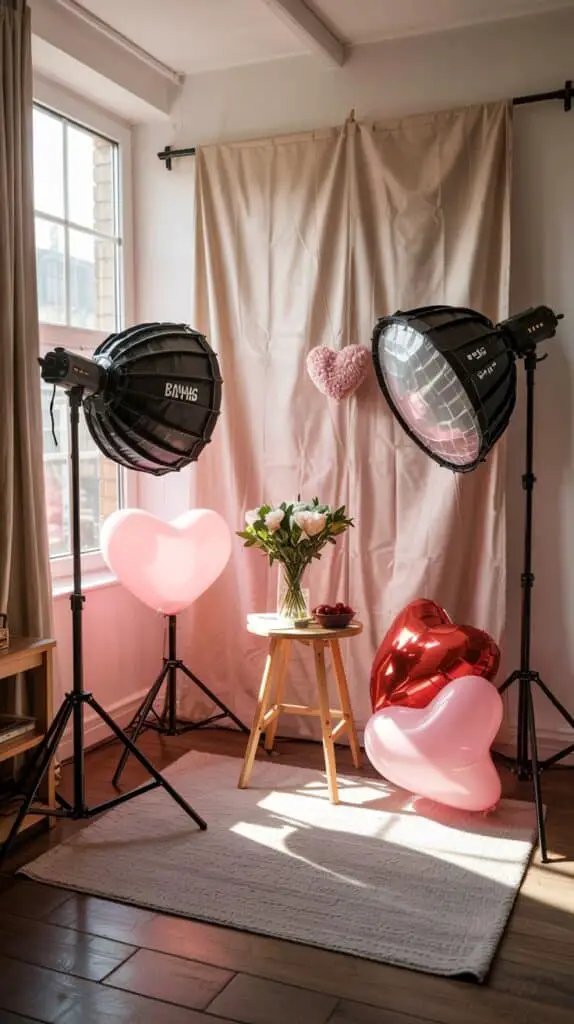
If you’ve ever loved those smooth studio-style photos, this is the most “content-ready” option and it’s surprisingly doable at home. A seamless Valentines Day Photoshoot Pink Backdrop can be made with a wide paper roll (craft paper or a photography backdrop roll). The key is to create a soft curve from wall to floor so you don’t see a hard line.
Tape the top of the paper to the wall with painter’s tape, then let it drape to the floor and curve forward. Use a few heavy books off-camera to keep the bottom from curling. Keep the rest minimal: one heart-shaped mylar balloon (not a whole bunch), or a single oversized bow clipped to the side.
To make it feel less “kids birthday,” pair the pink with a grounding neutral: a cream throw blanket on the floor, a light wood stool, or a white vase with branches. If you want a little sparkle, use one small reflective element like a mirrored tray or a glass vase instead of glitter.
This one works beautifully with a Valentine’s Day Photo Booth Frame too—especially a simple rectangle frame painted matte white or wrapped in blush ribbon. Keep the frame clean and let the backdrop do the work.
The heart-themed Photo Booth that uses shadows instead of sparkle

A Heart-themed Photo Booth doesn’t have to involve bright red everything. One of the prettiest approaches is using light and shadow to create the heart moment.
Try heart cutouts in the simplest way: cut medium hearts from thick cream cardstock (or even brown kraft paper if you want it moodier) and tape them in a loose, floating pattern across the wall. Keep spacing irregular like a gallery wall—more editorial, less “party banner.” Then place a lamp low and to the side so the hearts cast soft shadows. That shadow texture looks expensive in photos.
For seating, use a simple chair (wood, white, or black). Add one cozy detail: a faux fur throw in cream or pale blush. Keep props minimal: one heart lollipop-style prop, one handwritten note card, or a single bouquet.
If you want the hearts to feel more modern, mix sizes (small, medium, large) but stick to one color so it stays calm.
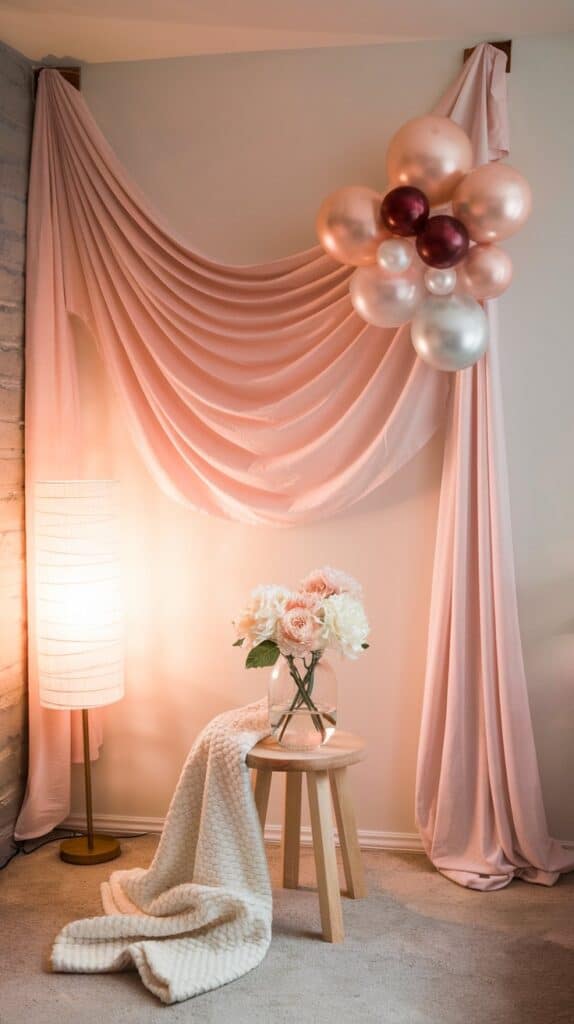
The “fabric drape + lamp glow” Valentine’s Photobooth for small spaces
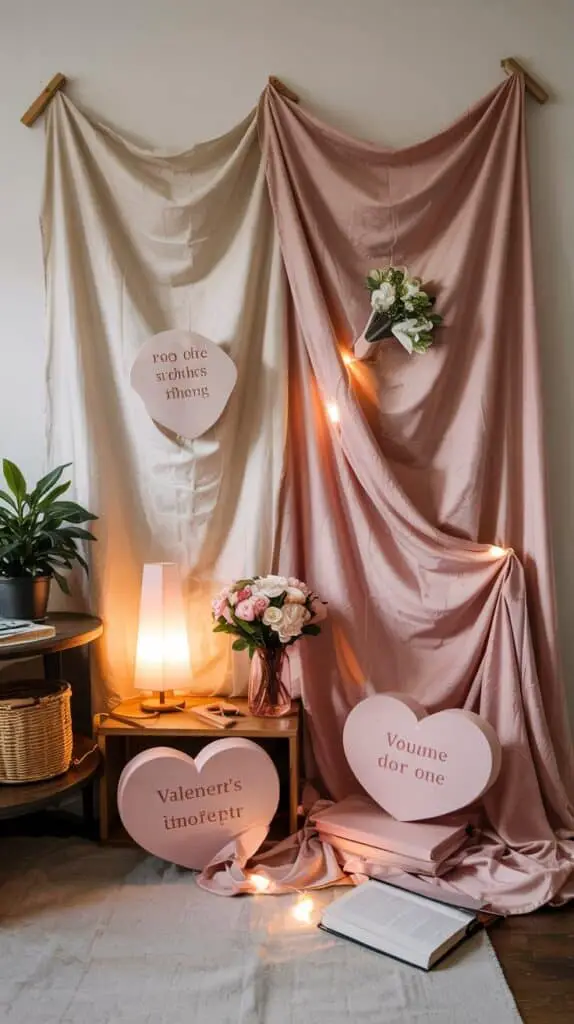
This is the most forgiving setup if you have limited wall space or you’re working in a lived-in room with furniture you can’t move much. Fabric instantly softens everything and reads romantic on camera.
Choose one fabric: a white sheet, a cream linen tablecloth, or a pale pink curtain panel. Tape it to the wall in a gentle, slightly imperfect drape. The imperfect folds are what make it look real and pretty. If you have a garment steamer, great—but you honestly don’t need perfection.
Then add two warm light sources: a table lamp on one side and a small string light tucked behind the fabric edge (not wrapped all over it). This gives you a subtle glow without the “dorm room” vibe.
For Valentine Photo Props, stick to touchable textures: a small bouquet, a heart-shaped box (plain, no loud branding), or satin ribbon tied around a book. This Valentine’s Photobooth style is especially good for couples and cozy friend photos because it flatters skin and hides visual clutter.
The modern balloon moment that doesn’t scream “party store”
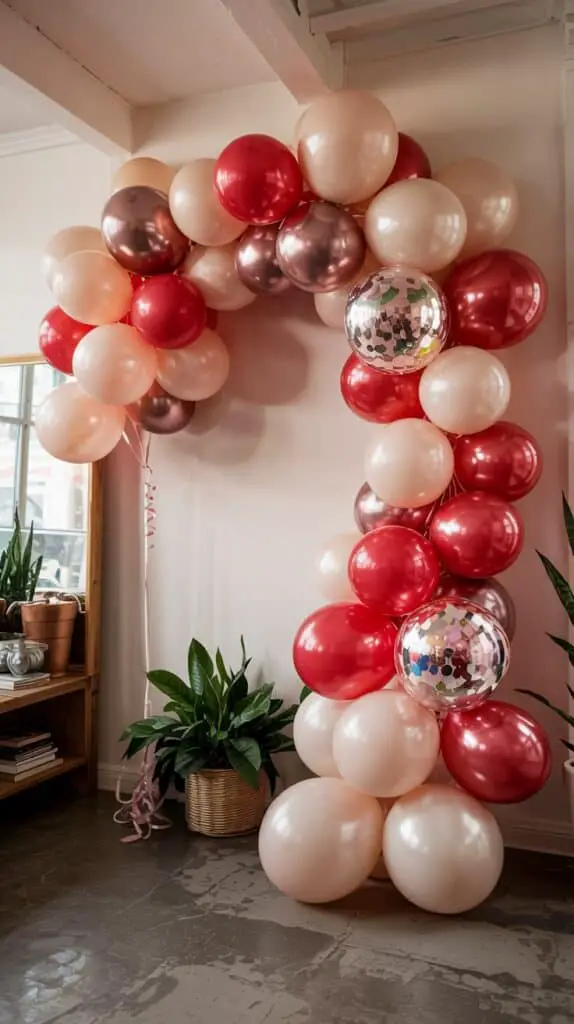
Balloons can look chic—if you edit aggressively. The rule is: fewer balloons, better placement, and a grown-up color mix.
Pick three tones max: blush, deep red, and pearl white (or all cream with one pop of red). Instead of a full arch, do a half-swoop on one side of the frame. Use balloon tape strip (the kind with holes) and attach it to the wall with painter’s tape. Keep the cluster tight and asymmetrical.
To avoid a shiny, cheap look, mix matte balloons with one or two subtle metallics. Don’t add confetti balloons. Then ground the bottom with a plant (even a simple pothos) or a basket so it feels like a styled corner.
This works great as a Valentines Photo Booth for parties because you can fit multiple people in the frame, and you can reuse the balloons for table decor after photos.
The “Polaroid wall” Valentine’s Day Photo Booth Frame setup
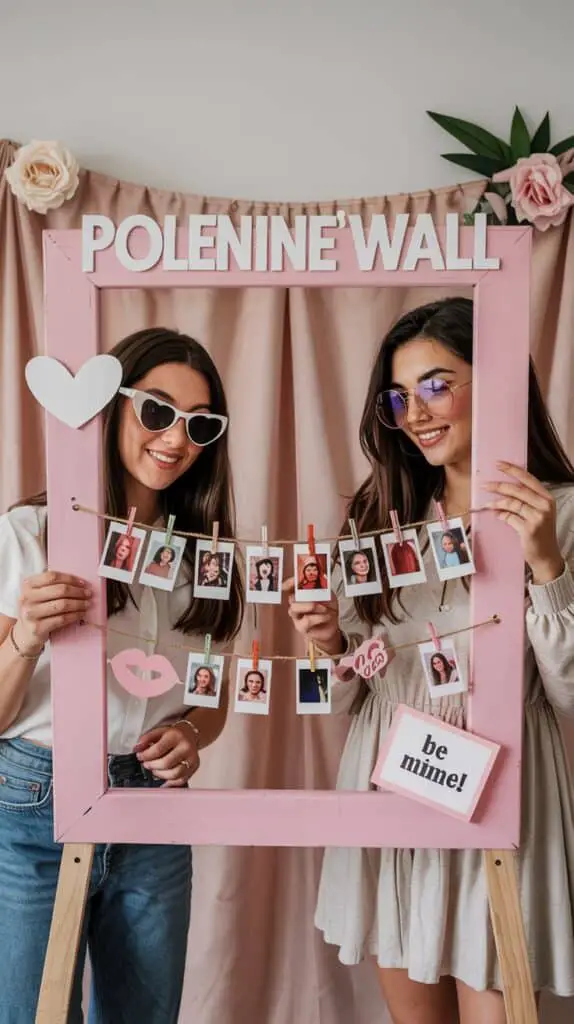
If you want something interactive that doubles as party decor, do a photo wall that builds itself over the night. This is especially fun for Galentine’s or family gatherings.
Create a large Valentine’s Day Photo Booth Frame out of foam board or cardboard and paint it matte white, blush, or a soft warm neutral. Keep it minimal—no huge “XOXO” letters. Then set up a small station with mini clothespins and a line of twine (or a grid of washi tape) where guests can clip instant photos.
Backdrop option: keep it simple behind the frame—plain wall, a fabric drape, or a soft pink paper roll. The “magic” is the evolving photo wall.
Props: a couple of sweet, clean options like heart-shaped sunglasses (neutral tones), one lip prop, and a simple “be mine” card in a modern font. If you don’t have a printer, handwrite on index cards with a black marker—honestly it looks more charming.
Lighting: point a lamp at the wall behind the frame so the background stays bright and the photos don’t look shadowy.
The vintage romance corner with thrifted frames and one floral moment
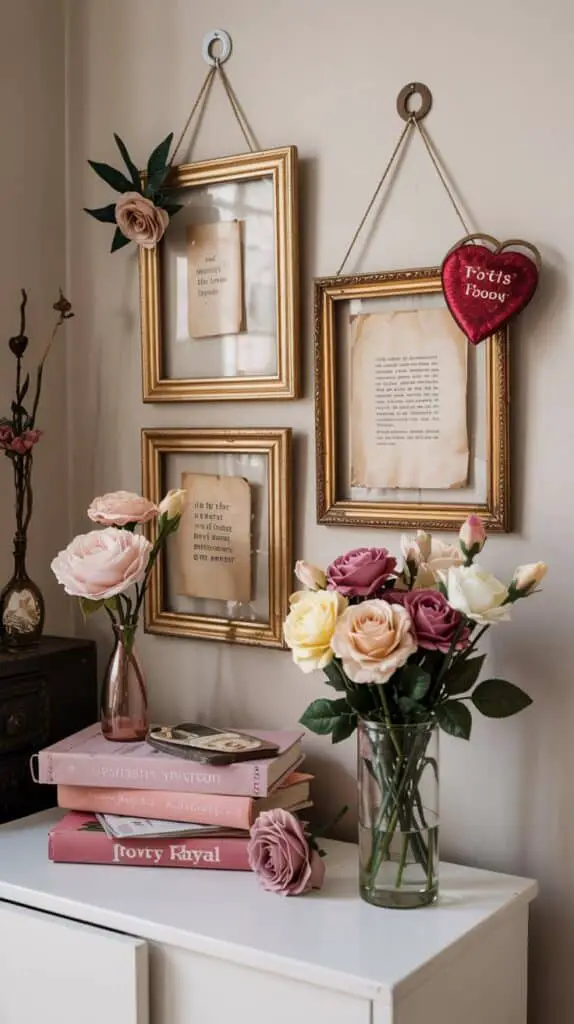
If you want your Valentine’s Day Photobooth to feel like a styled vignette rather than a party setup, go vintage. It’s renter-friendly and very “Pinterest interior” friendly.
Find two or three thrifted frames (gold or wood). Put them on the wall behind your photo spot using removable hooks or painter’s tape loops (for very lightweight frames). Inside the frames, use simple paper: cream cardstock, a blush wash, or even pages from an old book if you like a softer, antique vibe.
Then add one floral element—just one. Either a vase of roses, a bunch of grocery-store carnations, or even faux stems if you’re budget-conscious. Keep the flowers moody or soft: burgundy, pale pink, cream.
This backdrop is perfect if you’re photographing in a living room that already has personality. It doesn’t fight your decor—it layers into it.
The minimal “red lip + black” setup for a chic, not-sweet vibe
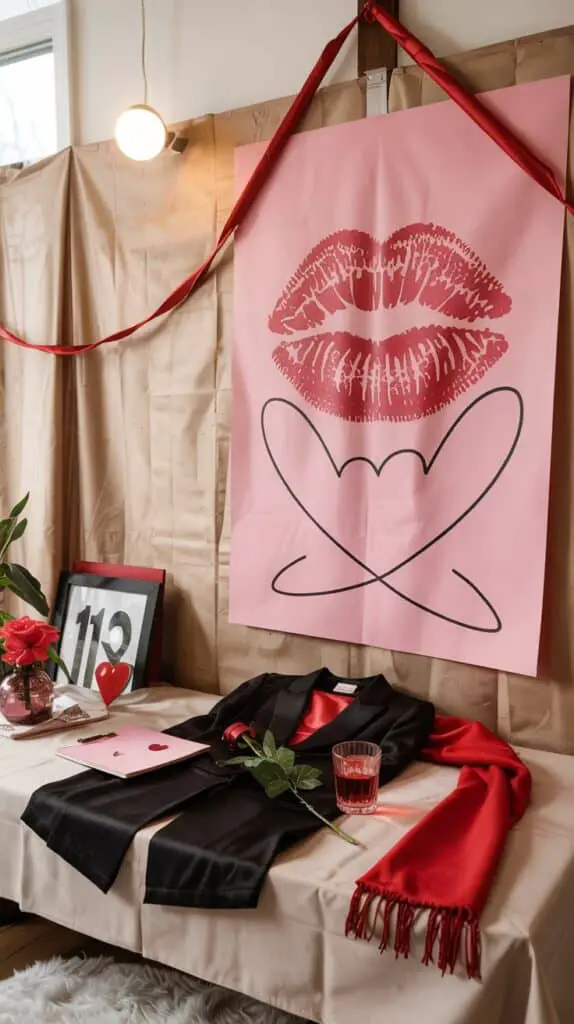
Not everyone wants pink. If you lean modern, do a high-contrast setup that still reads Valentine without being sugary.
Backdrop: a plain white wall or a cream sheet. Then add one bold element: a single red lip print (you can DIY with red lipstick on paper) or a simple heart outline in black tape. Keep it graphic and minimal.
Props: a black blazer, a red scarf, a single red rose, or a glass of something sparkling. This reads more “date night” and less “kids party.” It’s also one of the easiest photo booths to set up last-minute because you likely already own the pieces.
Lighting: warm but not yellow. If your bulbs are super warm, add daylight from a window and turn off overhead lights so skin tones don’t get weird.
The kids-and-pets-friendly Valentine’s Photobooth that still looks aesthetic
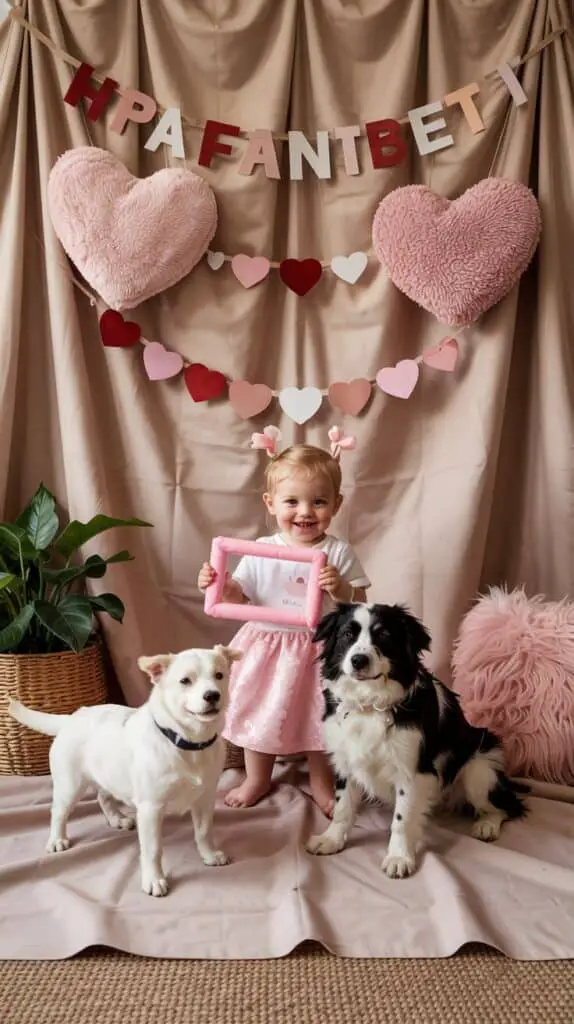
If you’re setting up a Photobooth For Valentines Day with kids or pets, the main challenge is durability. You want something that survives movement and still looks cute in photos.
Go for a sturdy backdrop: a fabric drape taped high and wide, or a paper roll that you can replace if it gets crinkled. Skip delicate garlands at face level. Use big, simple shapes higher up on the wall—like oversized hearts in two colors.
For props, choose soft and safe items: a plush heart pillow, a small felt banner, or a lightweight frame. Avoid anything with glitter or tiny pieces.
Add a low seating option: a pouf, a stack of floor cushions, or a small bench. For pets, put a textured blanket down so they’re comfortable and not sliding around. This setup still photographs well because the textures read cozy, and the backdrop stays clean.
The “window light” setup that looks like a real-life studio
If you don’t want to buy lights, use what you already have: a big window. This is the lowest-budget option and it often gives the prettiest results.
Pick a spot near a window with indirect light (not harsh sun blasting in). Hang a simple backdrop on the wall adjacent to the window: cream fabric, pale pink fabric, or a minimal heart wall. Put your subject facing the window. That’s it. The camera goes between the subject and the darker side of the room.
To make it more “Valentine’s,” add one styled detail: a vase of flowers on a stool, a heart balloon off to the side, or a bowl of strawberries on a small table. Keep it simple.
This works especially well for solo content, couples, or sweet family photos because the light is flattering and soft.
The quick “tabletop booth” for apartment living and small gatherings
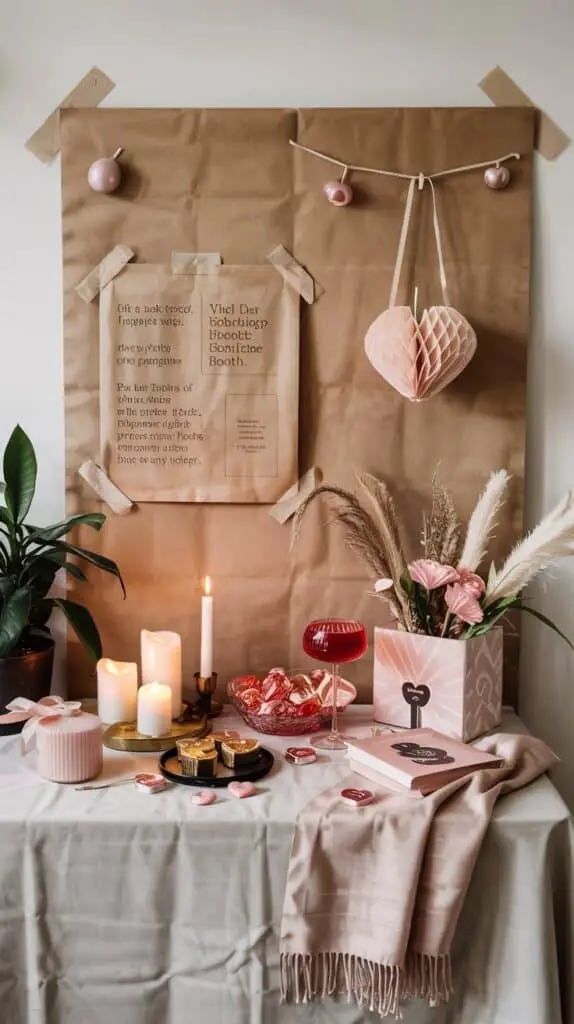
If you truly don’t have wall space, do a tabletop booth. This is also great if you want photos of desserts, cocktails, gifts, or hands holding props (instead of full-body portraits).
Use a tabletop near a wall. Put down a neutral base—linen, a scarf, or wrapping paper in blush. Then tape a matching paper or fabric backdrop up the wall about two feet high. Add one small prop moment: candles, a tiny vase, and a dish of candy hearts (keep it minimal).
For a Valentine’s Photobooth Backdrop at this scale, texture is everything: ribbed glass, satin ribbon, matte ceramics. Photograph from slightly above, and keep the edges of the scene clean so it looks intentional.
This is an easy way to get Pinterest-style photos without rearranging your whole home.
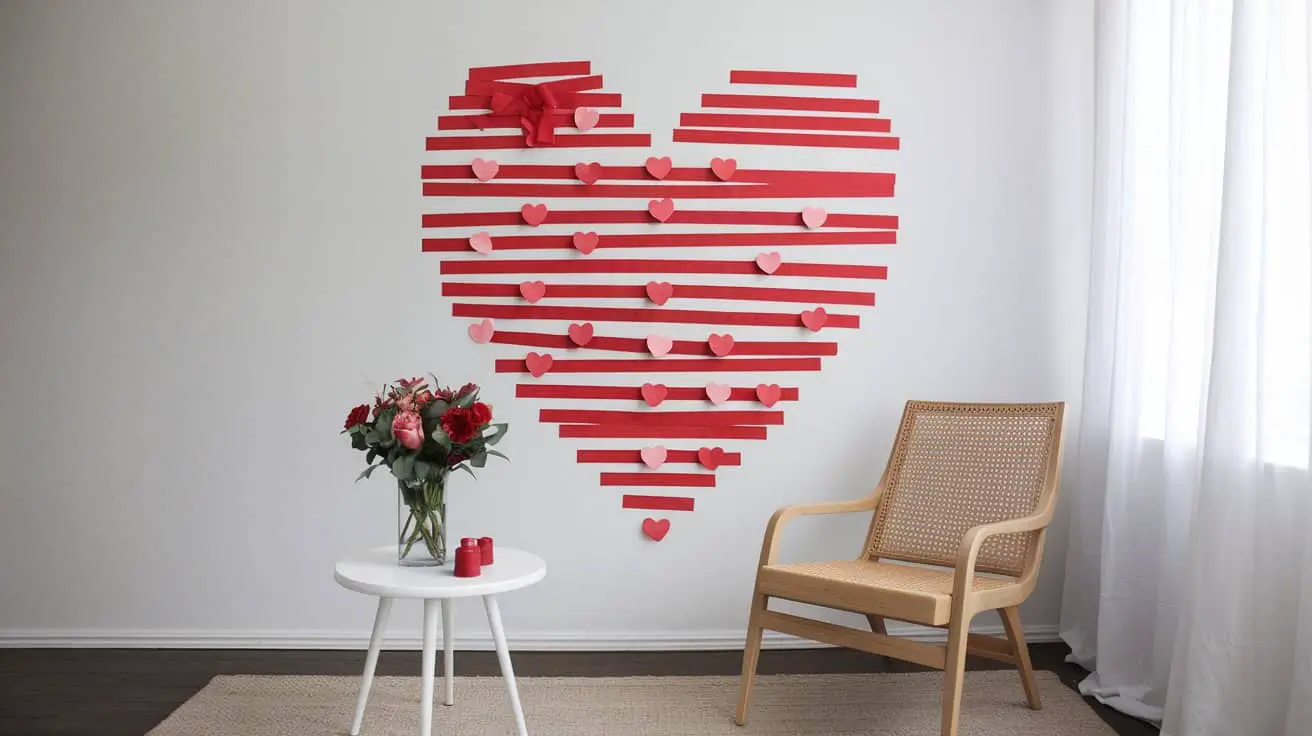
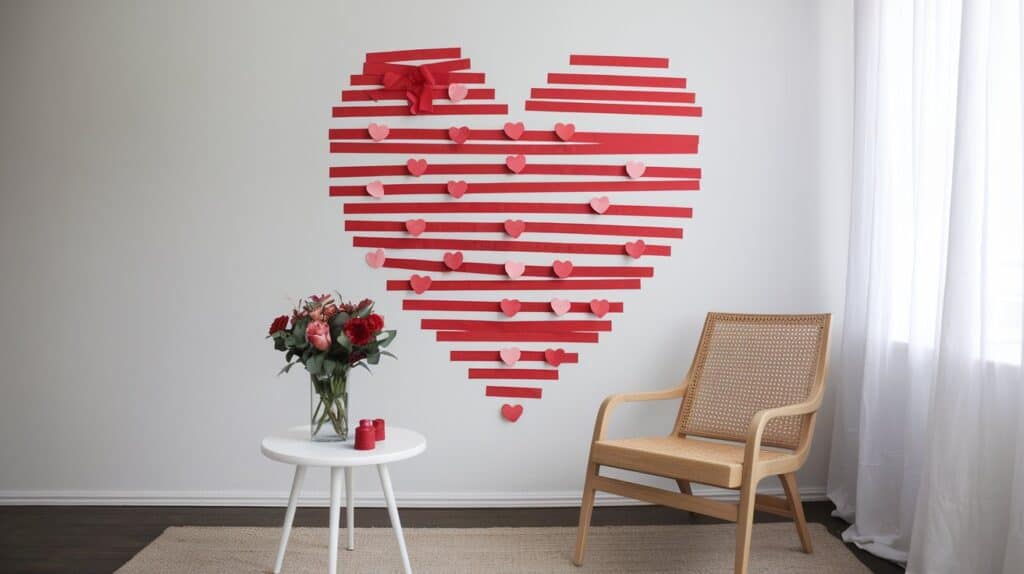
The “one statement heart” setup for people who hate clutter
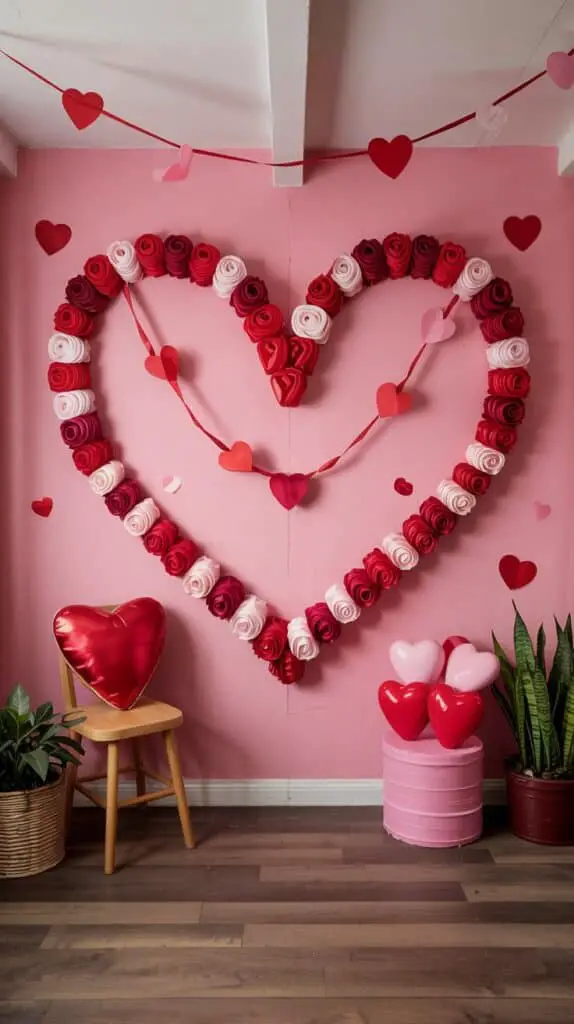
If you want the cleanest possible Valentines Photo Booth, do one oversized heart and nothing else. It’s simple, graphic, and it doesn’t look like you tried too hard.
Make a large heart outline with painter’s tape on the wall and fill it with a single material: red ribbon woven across, paper hearts all the same color, or even a heart-shaped arrangement of flowers (real or faux). Keep the heart centered, then leave the rest of the wall blank.
Add one chair or stool, and you’re done. This is perfect for small homes because it doesn’t visually take over the space—and it photographs beautifully.
Conclusion
A pretty Photo Booth for valentines day is mostly about restraint. Choose one backdrop idea, keep colors limited, use warm light, and treat props like decor—not party supplies. If you start with a simple formula (backdrop + one styled anchor + flattering light), you’ll end up with a Valentine’s Photobooth that feels sweet, modern, and actually like you.
This lip mask quietly gets a lot of love

- A leave-on lip mask that delivers intense moisture and antioxidants while you sleep with Berry Fruit Complex, Murumuru seed and Shea butter.
- Highlighted Ingredients: Berry Mix Complex: Rich in antioxidants to help reveal smooth and supple looking lips.Coconut Oil, Shea Butter, and Murumuru Seed Butter: Help nourish & deliver lasting moisture while you sleep. Vitamin C: Helps protect from external aggressors.
- Skin Type: Normal, Dry, Combination, and Oily
- Skincare Concerns: Fine Lines/Wrinkles, Dryness, and Dullness